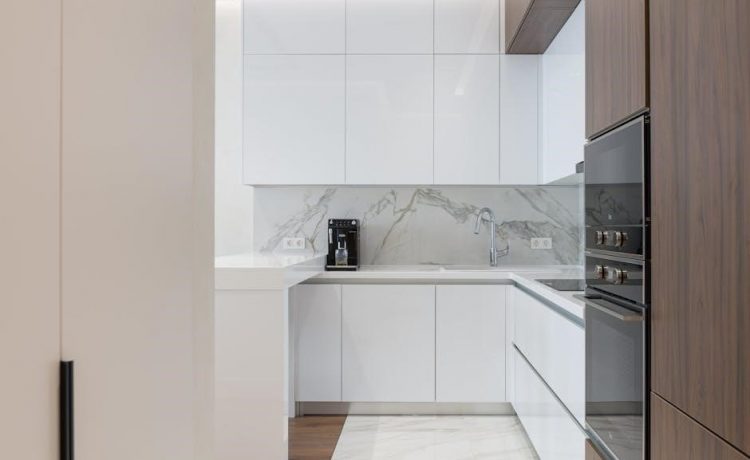
Understanding Your GE Self-Cleaning Oven
GE ovens provide a convenient self-cleaning feature, simplifying kitchen maintenance and ensuring efficient cooking performance for a healthier environment.
Before utilizing this function, remember to remove all pans and racks, and ensure proper ventilation to manage potential odors during operation.
Safety Precautions Before Self-Cleaning
Prior to initiating the self-clean cycle on your GE oven, several crucial safety precautions must be observed to prevent damage and ensure personal well-being. First and foremost, always remove oven racks and any cookware or bakeware from the oven cavity. Some models may specify whether racks need removal, so consult your user manual.
It’s vital to wipe away any large debris or excessive food spills before starting the cycle. The self-clean function is designed for baked-on residue, not substantial food particles.
Crucially, be aware of the high temperatures generated during self-cleaning, especially in ovens manufactured after 1980. These newer models are prone to component failure due to the intense heat, potentially leading to costly repairs like melted circuit boards. Consider manual cleaning as a safer alternative for these ovens.
Ensure adequate ventilation by opening windows or using a ventilation fan to dissipate potential odors released during the process.
Oven Preparation: Removing Racks and Debris
Thorough preparation is key to a successful and safe self-cleaning cycle for your GE oven. The initial step involves the complete removal of all oven racks, baking stones, and any cookware residing within the oven cavity. Refer to your oven’s specific user manual to confirm if rack removal is necessary for your particular model – some newer GE ovens may allow racks to remain inside during the cycle.
Next, meticulously inspect the oven interior for any large food particles, grease splatters, or substantial debris. While the self-clean function excels at tackling baked-on residue, it’s not designed to handle significant amounts of loose material.
Wiping away these larger remnants prevents excessive smoke and unpleasant odors during the high-temperature cleaning process. This preliminary cleaning step ensures optimal performance and minimizes potential issues during the self-clean cycle.

Initiating the Self-Clean Cycle
To begin, ensure the oven door is securely locked, and then select the self-clean feature on your GE oven’s control panel for operation.
Selecting the Clean Cycle Duration
GE ovens typically offer varying self-clean cycle durations, catering to different levels of oven soiling. Lighter cleaning needs may only require a shorter cycle – often around two to three hours – while heavily soiled ovens benefit from the extended, four-hour option.
Consult your specific oven’s user manual to understand the available durations and recommended settings for optimal results. The initial self-clean cycle is advised to be performed with kitchen ventilation, such as an open window or exhaust fan, due to potential odors.
Remember that longer cycles utilize more energy, so selecting the appropriate duration based on the oven’s condition is crucial for efficiency. Always prioritize safety and follow the manufacturer’s guidelines for a successful cleaning experience.
Locking the Oven Door During Cleaning
A critical safety feature of the GE self-clean cycle is the automatic locking of the oven door. This mechanism prevents accidental opening during the high-temperature cleaning process, safeguarding against burns and ensuring the cycle’s effectiveness.
The door will lock immediately upon initiating the self-clean cycle and remain locked until the oven has cooled down sufficiently. Do not attempt to force the door open during this time, as it could cause damage to the locking mechanism or result in injury.
The locking feature is a standard safety protocol for all self-cleaning ovens, and it’s essential to understand this function before starting the cycle. Refer to your oven’s manual for specific details regarding the locking system and any potential override procedures, if applicable.
What to Expect During the Self-Clean Cycle
GE self-clean cycles utilize high temperatures, potentially creating odors; adequate kitchen ventilation is crucial during operation for a safe and comfortable experience.
High Temperatures and Potential Odors
The self-clean cycle in a GE oven operates at extremely high temperatures, reaching levels designed to incinerate food residue. This intense heat is effective, but it’s also a key source of potential odors. As food particles burn, they can release smells that range from mildly unpleasant to quite strong, depending on what was cooked in the oven previously.
It’s important to be prepared for these odors and to ensure your kitchen is well-ventilated. Opening windows and utilizing exhaust fans or a range hood are highly recommended, especially during the initial phase of the cleaning cycle. The first self-clean cycle often produces the most noticeable smells.
These odors are generally harmless, but individuals sensitive to smells or with respiratory issues should take extra precautions. The smell will dissipate as the cycle completes and the oven cools down.
Ventilation Requirements During Operation
Adequate ventilation is crucial when running the self-clean cycle on your GE oven. The high temperatures involved generate fumes and odors from burning food residue, which can be irritating or even harmful if inhaled in concentrated amounts. GE specifically recommends venting the kitchen during the first self-clean cycle, but continued ventilation is beneficial with each use.
Open windows and doors to create cross-ventilation, and activate your kitchen’s exhaust fan or range hood. This will help to draw out the fumes and maintain air quality. Consider the proximity of smoke detectors; the cycle may trigger them due to the smoke produced.
Ensure pets, particularly birds, are removed from the kitchen area, as they are especially sensitive to airborne fumes. Proper ventilation minimizes discomfort and ensures a safer cleaning experience.

Post-Cleaning Procedures
After the self-clean cycle completes, allow the GE oven to cool completely before attempting to wipe away any remaining ash residue inside.
Allowing the Oven to Cool Down
Crucially, after the self-clean cycle finishes on your GE oven, do not immediately attempt any cleaning or open the door. The internal temperatures reach extremely high levels during this process, posing a significant burn risk. Patience is paramount; allow ample time for the oven to cool down completely.
The cooling period can take several hours, depending on the cycle duration and your oven model. Avoid any interaction with the oven during this time. The door will remain locked until the temperature drops to a safe level, a built-in safety feature.
Resisting the urge to expedite the cooling process is vital for both your safety and the longevity of your oven. Prematurely opening the door could also damage the oven’s internal components.
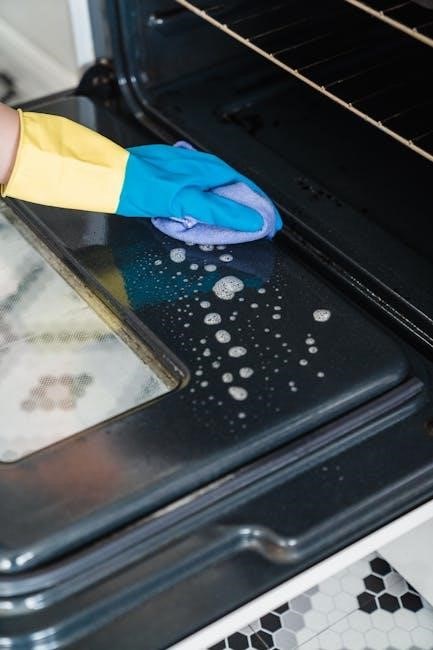
Wiping Away Ash Residue
Once the GE oven has fully cooled and the door unlocks after the self-clean cycle, you’ll likely find a fine layer of ash residue remaining inside. This is a normal byproduct of the high-temperature cleaning process and is easily removed.
Using a damp cloth or sponge, gently wipe down all interior surfaces – the oven floor, walls, door, and ceiling. Avoid abrasive cleaners or scouring pads, as these can damage the oven’s enamel coating. A soft cloth is best to prevent scratching.
For stubborn ash deposits, a paste of baking soda and water can be effective. Remember to rinse thoroughly with a clean, damp cloth to remove any baking soda residue. This final step ensures a sparkling clean oven!

Troubleshooting Common Issues
GE oven self-clean cycles can sometimes encounter problems, like error codes or failing to reach temperature; consult your user manual for specific guidance.
Error Codes and Their Meanings
GE self-cleaning ovens utilize error codes to diagnose issues during the cleaning cycle, providing valuable insights into potential problems. While specific codes vary by model, understanding common ones is crucial for effective troubleshooting. A locked door error often indicates the door isn’t fully latched, preventing the high-temperature cycle from initiating for safety reasons.
Temperature sensor failures can trigger codes, suggesting the oven isn’t reaching the necessary heat for self-cleaning; Circuit board malfunctions, particularly in newer models (post-1980), are a significant concern, potentially leading to complete oven failure due to overheating. Always refer to your oven’s user manual for a comprehensive list of error codes and their corresponding solutions. Ignoring these signals could result in costly repairs or even necessitate oven replacement.
Oven Not Reaching Cleaning Temperature
If your GE oven fails to reach the required cleaning temperature during the self-clean cycle, several factors could be at play. A faulty temperature sensor is a common culprit, preventing the oven from accurately gauging its internal heat. Electrical issues, such as a failing heating element or a problem with the oven’s wiring, can also hinder temperature attainment.
However, particularly in ovens manufactured after 1980, the issue may stem from the oven’s inability to withstand the intense heat of the self-clean cycle, leading to component failure and preventing proper heating. Before attempting repairs, consult your user manual and check for error codes; If problems persist, consider manual cleaning with oven cleaners as a safer alternative.
The Debate: Self-Clean vs. Manual Cleaning
Choosing between self-cleaning and manual methods depends on your preference and oven age; newer models may be damaged by the high heat of self-cleaning.
Risks Associated with Self-Cleaning Newer Models (Post-1980)
GE ovens manufactured after 1980 present significant risks when utilizing the self-clean cycle, stemming from changes in construction and design. These ovens often lack the robust build quality necessary to withstand the extremely high temperatures generated during self-cleaning.
Repeated exposure to such intense heat can lead to the failure of critical components, most notably the oven’s circuit board. Technicians report a high incidence of melted circuit boards in ovens subjected to frequent self-cleaning cycles, resulting in costly repairs.
The materials and manufacturing processes employed in post-1980 ovens simply aren’t designed to endure the thermal stress imposed by the self-clean function, making it a potentially damaging feature. Therefore, opting for manual cleaning with appropriate oven cleaners is strongly advised to preserve the longevity and functionality of your appliance.
Benefits of Manual Cleaning with Oven Cleaners
Choosing manual cleaning with modern oven cleaners offers a safer and often more effective alternative to the self-clean cycle, particularly for GE ovens manufactured after 1980. Contemporary oven cleaners have undergone significant advancements, reducing their toxicity and unpleasant odors compared to formulations from previous decades.
Manual cleaning allows for targeted treatment of heavily soiled areas, providing a more thorough clean than the self-clean cycle can sometimes achieve. This method avoids the extreme heat that can damage oven components, extending the appliance’s lifespan and preventing costly repairs.
While requiring some “elbow grease,” manual cleaning provides greater control and minimizes the risk of electrical failures associated with the self-clean function, ensuring a consistently clean and functional oven.

GE Oven Self-Clean Cycle Specific Instructions
GE oven self-clean instructions vary by model; always consult your user manual for precise guidance regarding rack removal and cycle initiation procedures.
Referencing Your Oven’s User Manual
Your GE oven’s user manual is the definitive source for self-clean cycle instructions, as procedures can differ significantly between models. It details specific rack removal requirements – some models permit leaving racks in, while others necessitate their removal before initiating the cycle.
The manual will also outline model-specific cleaning recommendations, including suggested cycle durations and any unique safety precautions relevant to your particular oven. Pay close attention to any warnings regarding potential odors or ventilation needs during the self-clean process.
Furthermore, the user manual provides crucial information on interpreting error codes that may appear during or after the cycle, enabling effective troubleshooting. Ignoring the manual’s guidance could lead to improper operation or even damage to your appliance. Always prioritize the instructions provided within your oven’s documentation for optimal and safe self-cleaning.
Model-Specific Cleaning Recommendations

GE oven self-clean cycles aren’t universally identical; recommendations vary by model year and design. Post-1980 models are particularly sensitive, with a significant risk of component failure due to the intense heat generated during self-cleaning. Experts strongly advise against using the self-clean function on these newer ovens, favoring manual cleaning with modern oven cleaners instead.
For older models, always consult your user manual for the recommended cycle duration. The first self-clean cycle often requires enhanced ventilation – opening a window or utilizing a range hood is crucial to dissipate potential odors. Remember, even with proper ventilation, some smell is common.
Prioritize manual cleaning with updated, less-toxic oven cleaners as a safer alternative, especially for newer GE ovens, mitigating the risk of costly repairs like melted circuit boards.